Blog | Worship Tracks: 5 Most Common Ableton Pitfalls
Worship Tracks: 5 Most Common Ableton Pitfalls
Ableton is an incredibly powerful tool, especially in worship music. Churches of all sizes around the world are using it during live services for a variety of purposes. It enables keyboardists to run synth patches, pianos, and other instruments. It can be used for complex automation of keys patches, tracks, and other instrumentation during a worship service. And of course, it can be used as a simple click track and guide. The capabilities of the program are pretty much limitless.
However, given the complexity of the program, many churches are misusing Ableton and it’s features, either harming the sound quality of their tracks or simply not allowing them to realize the full potential of the DAW.
Common Ableton Worship Track Pitfalls
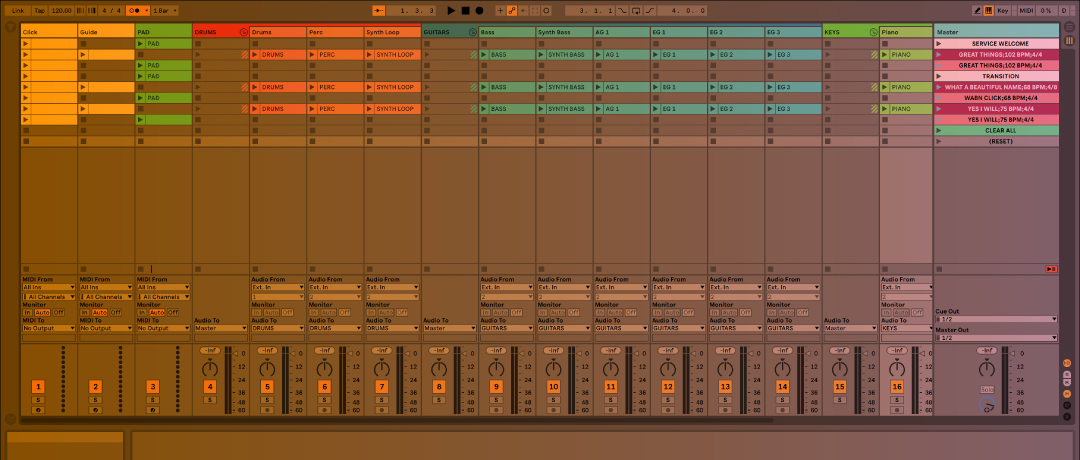
Before I begin, I want to specify that I use Ableton almost exclusively in Session View when it comes to worship tracks. Most of these points aren’t correlated to the scene setup you’re using, but I feel it’s necessary to mention it in order to clear up any confusion when describing where to find certain things.
This list is by no means an exhaustive review of Ableton worship pitfalls, but it is a summary of some of the more prominent issues I notice in worship pastors’ and music directors’ use of the program during worship services. In no particular order, here they are!
Warping: Warping All, Warp Modes, and Warp Tempos
Ok, so that’s a bit more than “one” pitfall… But warping is an animal of its own, and it is so incredibly important. Warping tracks correctly gives you the flexibility of automating volumes in sections, changing keys on the fly, and making tracks sound the absolute best they can.
Essentially, it empowers Ableton tracks to change with the same flexibility and fluidity as instrumentalists. Improper warping practices will cause you to constantly be battling Ableton and create for a very inefficient workflow.
Let’s break these down into smaller sections:
Warping All Tracks
If you ask me, one of the cardinal sins of Ableton worship track usage is only warping a select number of tracks in a song and not others. Why is this so important?
Well, if you plan on having the flexibility of changing keys of tracks, start times, end times, or automating any volumes (i.e., fading out a 20 second long synth at the end of a song that’s droning out forever), you’ll only be able to do it on tracks that have warp enabled. So, if you show up to rehearsal without having warped all tracks in a song, things are going to get out of whack really fast.
Warp. All. Of. Your. Tracks. Before. Rehearsal.
Thank you.
Warp Modes
When you warp tracks, have you noticed that the default Warp Mode is “Beats”? I kind of have some beef with Ableton about that… You can go change that in Preferences under the “Record Warp Launch” tab. Beats is pretty terrible for anything except drums, percussion, or guides. Why?
The Beats warp mode has no consideration for pitch or complicated instruments – it is only concerned about transients (i.e., snare drums, kick drums, or other harsh transients). Pads, synths, keys, guitars, bass, and BGVS do not have harsh transients, and as a result, sound terrible when warped with this mode if any transposing is being done.
Spend the extra time to find the warp mode that sounds the best, and this may be different depending on how much you are transposing the tracks. Ableton has their own descriptions of which to use on what tracks, but here is my opinion based on what I have found to sound the best:
-
Complex Warp Mode: Guitars, Synth, Pads, Piano, and other complex harmonic instruments.
-
Complex Pro Warp Mode: BGVS and Vox ONLY. Complex Pro tries to make vocals sound more natural when a song is transposed up or down by pulling certain high or low frequencies out so that the vocals stay in a relatively “human” register. So you can imagine how gritty and nasty it sounds when applying that logic to synths, keys, guitars, etc.
-
Beats: Drums, Perc, Guides, and Click. Once again, transient prominent tracks with no concern for pitch.
-
Tones: Bass. Anything with a simple, clean pitch.
-
Textures: Droning Pads, and Strings. Anything without a lot of movement happening, EXCEPT for Strings. Why wouldn’t you warp strings with Complex? Beats me… But every time I use complex on strings, they get all out of whack if I transpose at all.
If you warp everything to the Beats mode, your tracks will start sounding terrible transposed to anything more than 3 half steps, if that. However, being diligent about warp modes and following the above advice, I find that I can warp tracks up to 5-to-7 half steps up or down and still have them sound pretty dang good. It’s crazy how much warp modes matter, and yet so many people completely neglect them.
Warp Tempos
Ok, first of all, if you haven’t changed your auto warp settings in preferences, you should do this immediately. Open up preferences (Ctrl/Cmd+,), go to the “Record Warp Launch” tab and turn off the “Auto Warp Long Samples” setting. Then save this set as your new default set.
Auto-warping samples when imported creates all kinds of problems. Chances are high that they’re going to get warped to the wrong tempo automatically, you’ll try to salvage it, and it will only screw things up.
Once you have that setting turned off, make sure you do these steps in this order when pulling tracks in for a new song:
1) Create the song name, BPM, and meter in the scene name following this format: SONG NAME;120 BPM;4/4 (obviously changing the BPM and meter appropriately)
2) Drag in tracks (holding ctrl will stack them horizontally)
3) Press play on the scene and then stop it (this resets the tempo/meter in Ableton that the warp will reference on the tracks).
4) Warp all your tracks, and they will reflect the correct tempo and meter.
Automating Mixer Volume Instead of Clip Volume
This is also a big one that no one really understands. This isn’t specifically related to Session View (it also includes Arrangement View), but start by clicking on a clip in Session View so that it appears on the lower bar, open up the “Show/Hide Envelope Options” box (the button in the lower left corner with the two diagonal arrows).
This will only work if you have warped your clip. You should see two drop-downs – one says “Mixer” and one says “Clip”. Let me make this incredibly clear: Never use “Mixer”…
If you change the volume using “Mixer” rather than “Clip”, you are actually changing the file and file size itself. You are literally modifying the panning/volume/reverb/delay/fade of the file itself – not modifying it with automation within Ableton only.
This will change your Ableton file size and potentially create glitches or crashes. I’ve experienced it firsthand several times.
Make sure you select “Clip” and only adjust the clip volume automation when you need to duck volumes in certain spots.
This also applies to adjusting the volume of an entire clip. Do not, and I repeat, do not adjust the volume of the clip in the “Sample” menu on the lower bar – make sure you do it on the “Track Volume” slider (you can see what each thing is by expanding the Info Menu in the lower left-hand corner so that everything you hover over is described in there).
Forgetting to Reset the Start Point After Warping
Have you ever warped your tracks to the correct meter and BPM and still found the tracks to be out of time? Chances are very high that it is an issue with the Start Time automatically being readjusted (incorrectly) after warping.
Occasionally, for who knows what reason, Ableton will chance the start time of a clip after warping to be something other than 1.1.1.
Make sure that every time you reset the start point to 1.1.1. if it auto-warps it to any strange numbers that may be even a tiny fraction over the correct start time.
Not Grouping Tracks
“Hey, can you turn down the BGVS on this track, turn off the Acoustic, and turn on Electric 3?”
“Uhhh… Yeah. Give me… ooonnneee minute. Hang on…”
If you’re not grouping tracks, you’re wasting both your and everyone else’s time during a rehearsal. Grouping tracks is helpful for several reasons. Firstly, grouping tracks makes routing audio incredibly easy, as you can group guitars/bass, drums/perc, BGVS, click/guide, and keys into separate groups. Furthermore, if you color code your groups consistently based on instrument, it’ll be easier to find and adjust things on the fly.
Grouping tracks is also incredibly important for sake of organization (the same reason as color-coding tracks). It’s easy to find things quickly and even adjust entire instrument groups’ volume at the same time.
Not Performing “Collect All And Save”
This is a tough one to describe, but lets take the example of building a live setlist:
You have several songs worth of tracks on your computer. You create an Ableton setlist for this week’s worship. You pull in the audio files to Ableton. You get to church to open the Ableton session – either on your own computer or the church computer – and none of the samples are in there (“Samples are Offline” error). So what’s the issue?
When you create a new Ableton file, Ableton actually creates two things. Firstly, it creates the Ableton .als file. However, it also creates an Ableton Project folder. Ableton likes when everything within your .als file is referencing only things within the Ableton Project folder for that session. You obviously can reference things from outside of that folder, but things get messy when you do that.
If you so much as change any folder names or locations for any folders that are enclosing materials that are a part of your Ableton session, Ableton won’t be able to find the files and you risk losing all your work. This is especially true if you are using Dropbox or Google Drive and opening the .als file on another computer than the one it was built one, because although you may share the file and multitracks for the songs, the Ableton directory will not be able to follow the same computer-specific folder path to find them on the new computer.
Whenever you create a session and pull in multitracks to the appropriate places, the last step you should take is to “Collect All and Save”. Do this by going to File -> Manage Files -> Manage Project -> External Files -> Collect Into Project, and then press “Collect and Save” in the lower right-hand corner.
What this will do is pull every sample/multitrack file that is a part of the current session and copy them into the Project folder for that particular Ableton session. This way, you will not be referencing any external files on your computer, and the only folder that will matter for your Ableton session will be the Project folder that it’s a part of.
So, you could then easily just copy that single Project folder with everything in it and put it wherever you want – Dropbox, Google Drive, an external hard drive, someone else’s computer, etc. As long as the entire folder moves, you’re good to go!

About the Author
Chris Fleming is a professional musician from Minneapolis, MN who has played with artists such as Kari Jobe, TAYA, Aodhan King, and Jason Gray. He is actively involved with the CCM scene and has contributed as a drummer, music director, song writer, and producer for various worship artists and churches locally and nationally. Chris is the Motion Designer at Motion Worship, helping to create motion background collections and countdowns for our subscribers.