Blog | Making Church Drum Mics Sound Good: The Ultimate Guide
Making Church Drum Mics Sound Good: The Ultimate Guide
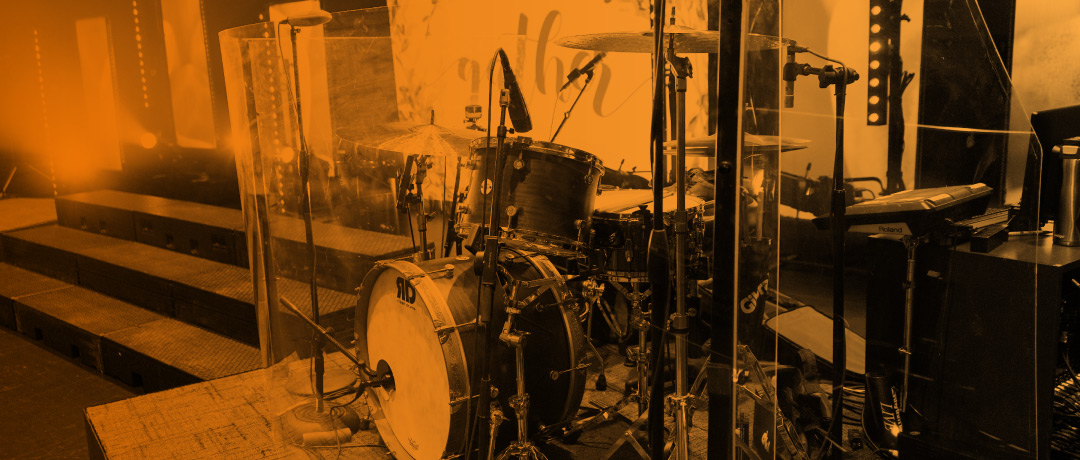
Drums are a doozie for tech directors and sound engineers. So many mics, so many cables… so much sound. And don’t even get us started on drummers (an article for a later point in time.)
Micing a drum kit can get a bit confusing if you’re not completely informed on what you should be doing. Here are just a few frequently asked questions we’ve gotten from church tech directors:
“Do I close mic everything?”
“Are overheads alone enough?”
“How far apart should overheads be?”
“If I don’t have enough channels for all drums, which ones are essential?”
“What mics should I be using?”
“Why do my drums sound muddy?”
“How do I get drums to come through the speakers with less stage volume?”
And the list goes on! Luckily, it doesn’t have to be all that confusing, and with a couple simple tips, you’ll be on your way to properly micing your church’s drum kit.
Church Drums: Properly Micing a Drum Kit
Proper drum micing is a big topic – you have to address phase issues, what types of drum mics to get, how many mics are necessary, mixing techniques, and a ton of other factors in order to get an all-inclusive picture on the topic.
However, there are a few very important key topics that we want to address immediately. If you’re getting strange filtering noises, loosing low end, having a muddy drum mix, or just an overall difficult-to-manage mix in general, chances are you are experiencing some issues with drum phase. Here’s what that’s all about:
Phase: What Are Drum Mic Phase Issues?
If your mics are out of phase, nothing else matters. To describe this issue, we’ll have to describe a little bit about how sound works and it will get kind of technical, but we’ll make it brief:
Sound works through inward and outward vibrations, which we can think of as “changes in the direction of pressure”. If you’ve ever zoomed in on a sound wave, you’ll see there’s a wave that goes up above center, then down below center, then back up, etc. An upward movement signifies the microphone is experiencing pressure being applied, while a downward movement suggests pressure is being pulled away from the microphone capsule.
A snare drum head, when first striked, moves away from the mic. Thus, if you zoom in on a snare recording wave file, the first movement of the wave will be downward. A kick mic however is experiencing the forward pressure of the kick being struck, meaning the first wave movement is upward. Pretty simple, right?
Here’s the issue:
Sound travels at a particular speed. When you hit your snare, the sound will hit the snare mic before it hits the overheads. What that means is that by the time your snare mic’s audio wave is traveling upward, the sound may just be making it to your overheads causing a downward-moving wave file. You now have the same sound source being recorded by two mics, but one source’s audio wave is traveling up while the other is traveling down.
This behavior causes the audio signals to cancel each other out, meaning you either 1) hear a very “phase-y” sound (more common with cymbals being out-of-phase), or 2) lose a ton of low-end frequencies in your mix. Problem is, you won’t notice it until after you get all your phase issues sorted out. Only then will you notice the light-and-day difference phase aligning makes.
Here’s how to fix phase issues:
How to Fix Phase Issues
Note: You can fix phase issues even if you don’t have the ability to record and look at audio waves. Read on to hear more.
REMEMBER: When we are taking about “aligning phase”, it’s always between two or more mics. An audio wave doesn’t matter until it begins to interact with other audio waves in a favorable or unfavorable manner.
There are two ways to fix phase issues, and you’ll probably end up doing a mix of both. As stated before, sound must travel at a certain speed, and when mics are in two different locations, they receive the sound at different points in time. Thus, moving a mic further or closer to a source may put it in phase with other mics, as it gives more or less time for a wave form to move back up or down before the next mic’s wave form is added to the mix.
Here are some brief tips on fixing phase issues:
1) Phase-Align Your Overheads
Before you talk about phase-aligning your kick, snare, and toms, your overheads must be in phase with one another on kick, snare, and toms. Here’s what we mean:
If you record the kick, snare, rack tom, and floor tom with your overheads, the waves on your right and left overheads need to be moving in the same direction as each other for each of those drums. The best way to do that is to make sure that the mics are the same distance apart from each drum. Since that’s not completely physically possible, here’s what you can do:
Treat the kick pedal as the center of the drum kit. Get your overheads as close together as possible, angling one slightly to point towards the left side of the kit, and one to the right side of the kit. You are now pointing at and capture the entire kit, but your mics are extremely close together and centered on top of the kit. The sound coming from each of the drums should now hit each of your overheads at the same time, eliminating any phasing issues between your overhead mics.
2) Mic Polarity
Polarity simply refers to the direction an audio wave travels. If you “flip” the polarity of a channel, the audio wave will travel the exact opposite way (i.e. start moving up first rather than down or vice versa).
The simplest way to correct mic phase issues is to isolate the overheads and 1 drum at a time – whether it be kick, snare, or one of the toms. Have someone play that one drum over and over while you press the polarity-reverse switch (looks like a circle with a line through it). Listen for which way sounds “fuller”. If you are hearing a loss of low-end, or are hearing any “thinness”, that means it is out of phase. Get each mic in phase. Once you are done with one drum, mute that drum channel and move to the next (remember to always have your overheads on, as the goal is to phase align each drum with the overheads).
3) Mic Placement
The above solution works great and doesn’t require you to have a recording of each of the drums to phase align everything. However, even at that, the waves produced by your drums may not be directly in or out of phase. They may be between either extreme, causing a messy and thin “middle ground” sound. If this is the case, begin messing with the placement of each mic. Push it slightly closer or further away from each drumhead until you get the mic’s wave file directly out or in phase with your overheads. You can then use the mic polarity switch to do the rest.
Drum Mic Selection
That was a lot about phase issues, but that is the single most important factor to address. It doesn’t matter how expensive your sound system and mics are – if your mics are out of phase, it will always sound thin, bland, and fail to cut through the mix.
Now that your mics are in phase, lets talk a bit about drum mics.
How Many Mics Are Necessary?
This really depends on what your kit looks like and the room your recording in! But if you’re in a small room, your first mic purchase should be a kick mic. That’s where all the “punch” and low-end from your kit will come from, and it should always be your top drum mic priority.
Only problem with micing the kick alone is you now have some drum kit sound coming from the stage, and some coming from the mains (which can be an awkward balance). After getting a kick mic, your next priority should be snare and overheads, and we highly recommend you buy those at the same time. That will give you a great mix, but if you have the extra money and want to bring out the fullness of the drum kit, tom mics are next on the list.
Best Mics for Church Drums
Here are our top 3 favorite mics for each drum. We recommend getting them used on Craigslist or Reverb.com! Great way to get fully functional church drum mics at a fraction of the price.
Kick
1st Pick: Audix D6
2nd Pick: AKG D112
3rd Pick: Sennheiser e602
Snare
1st Pick: Shure SM57
2nd Pick: Audix i5
3rd Pick: Audio-Technica AT2021
Overheads (get 2 of the same kind for right and left channels)
1st Pick: AKG Perception 220
2nd Pick: MXL 2003A
3rd Pick: Shure PG42
Toms
1st Pick: Sennheiser 421
2nd Pick: Shure SM57
3rd Pick: Prodipe TT1
Take a Breather
That was a long article, but if you’ve made it all the way through, you’re on your way to making your drum mics sound the absolute best they can. Phase aligning your overheads with each other and the rest of the drums immediately will give you a fuller, bigger sound that will cut through a mix more clearly. Get your overheads in phase and spend time isolating overheads with one drum at a time, flipping the polarity on the individual drum’s mic until it sounds “fuller” with the overheads, and then move to the next mic. Drum mics can get spendy really quick. Look for used drum mics on eBay, Craigslist, and Reverb. If all else fails, there are plenty of drum mic kits out there for relatively cheap that should do the trick!

About the Author
Chris Fleming is a professional musician from Minneapolis, MN who has played with artists such as Kari Jobe, TAYA, Aodhan King, and Jason Gray. He is actively involved with the CCM scene and has contributed as a drummer, music director, song writer, and producer for various worship artists and churches locally and nationally. Chris is the Motion Designer at Motion Worship, helping to create motion background collections and countdowns for our subscribers.